How To Test a Synchronous Motor with Modern Technology
In order to further understand the application of motor circuit testing and analysis on synchronous electric motors (synchronous machines), it is important to have a brief overview of the operation of a synchronous motor, the most common faults, common test methods, how the ALL-TEST IV PRO™ (Now AT5™) works with large synchronous motors, basic steps for analysis of synchronous stators and rotors, and, expected test results (Editor- ALL-TEST PRO 5™ is the recommended replacement for the ATIV™). In this paper, we will discuss these various aspects, referencing other materials for additional details.
About Synchronous Machines
Large synchronous motors have two basic functions:
- The first is to improve the electrical power factor in a plant. In any plant with large inductive loads, such as motors and transformers, current begins to lag behind voltage (poor power factor). When this becomes severe enough, the plant requires significantly larger amounts of current to perform the same amount of work. This can cause voltage sag and overheating of electrical components. A synchronous motor can be used in such a way as to cause little to no impact on power factor, or can be used to cause current to lead voltage to correct power factor problems.
- The second method of operation is to absorb pulsating loads, such as reciprocating compressors. Once a synchronous motor has achieved synchronous speed, it has coils that ‘lock’ in step with the electric motor’s rotating magnetic fields from the stator. If a torque pulse occurs (such as at the top of a reciprocating compressor stroke), the motor may come out of synch with the rotating fields. When this occurs, a special winding on the rotor called an amortisseur winding (see synchronous construction below) absorbs the energy from the torque pulse, keeping the rotor in synch.
The basic construction of a synchronous motor is straightforward. There are three sets of windings, a stator, a rotor, bearings, and either a generator (brushless) or a ‘static exciter’ (brush-type).
The windings consist of:
- A standard three-phase winding, very similar to a standard induction electric motor
- A set of field coils, which are DC coils made of round wire for small machines and rectangular or ribbon wire on larger machines
- An amortisseur winding, which is similar to an induction motor rotor squirrel cage
The starting methods for both the brush-type and brushless synchronous motors are similar. The starting circuit will be different for both. Following is a description of the basic mode of operation, followed by a brief description of the differences:
During the starting phase of a synchronous motor, it acts much the same as a standard induction motor. The stator receives an electrical current and a rotating magnetic field is developed (the speed = (120 * applied frequency) / # of poles). This field generates a current in the amortisseur winding, which is used to develop starting torque by generating its own magnetic field which interacts with the stator magnetic field in the air gap and causes the rotor to follow the stator magnetic fields. As the rotor starts to catch up to the stator fields, DC current is injected into the rotor field coils, creating north and south magnetic pairs (rotor coils are always found in pairs). These lock-in step with the stator magnetic fields and follow at the same speed as the stator fields, whereas a standard induction motor always lags behind.
In a brush machine, the DC source for the rotor fields usually comes from a ‘static’ (electronic) starter, which converts a supplied AC power to DC. In most cases, the output DC is varied through the starting cycle. The drive may also be set up to short out the field coils of the machine to avoid rotor saturation and the resulting extremely high currents on the stator. Once the rotor begins to turn, DC is supplied to assist the motor in developing torque. The DC voltage is supplied through a pair of slip rings and brushes.
In a brushless machine, a DC generator is installed directly on the shaft of the synchronous motor. As the synchronous motor starts, the generator provides very little DC through its commutator. As the speed increases, the DC voltage also increases, helping the motor generate torque and then lock in step at synchronous speed. In this type of machine, the generator is wired directly to the rotor fields.
There are also machines that have a generator mounted on the shaft of the rotor that feeds a separate control. This is used to first short the windings and then control the amount of DC fed to the rotor, just as the brush machine.
Most Common Synchronous Motor Faults
Large synchronous motors tend to be well-built and sturdy. They are often overbuilt with material to withstand the severe loads that are applied. The most common failures for industrial synchronous machines, in order, are:
- Bearings due to general wear and contamination
- Rotor fields – due to high temperatures, these will often burn up from the inside out
- Amortisseur windings – mostly in reciprocating loads. Because of the amount of energy absorbed, the winding bars will often crack. In particular, if the rotor fields are beginning to fail and are short, making it easier for the rotor to fall out of ‘synch.’
- Stator windings – general wear and contamination. Stator windings in synchronous machines tend to be ‘form wound’ and heavily insulated.
Almost all of the winding faults that occur in a synchronous motor start between conductors in the rotor or stator coils.
Common Test Methods, Strengths and Weaknesses
Following are the traditional test methods for evaluating the condition of a synchronous motor:
- Insulation resistance testing: Using applied DC voltages as specified by IEEE 43-2000, a potential is placed between the stator windings and ground. This measures only direct faults between the stator windings and the stator frame. Is also performed through the slip rings on a brush-type machine.
- Polarization Index: This is a 10-minute to 1-minute ratio of insulation resistance. This has been traditionally used as a method to gauge the condition of the insulation between the stator windings and frame. As with insulation resistance testing, this can also be performed through the slip rings on a brush-type machine. As stated in IEEE 43-2000, this test method is only truly valid on pre-1970 insulation systems.
- High Potential testing: Most common on large machines is DC high potential testing which is performed at a value of twice the motor nameplate voltage plus 1000 volts, times the square root of 3. On an existing insulation system, this value is often reduced to 75% of the potential voltage. This test highly stresses the insulation system and is potentially damaging (per IEEE Std’s 388 and 389). This type of test should NEVER be applied to the rotor windings of a synchronous motor.
- Surge Comparison testing: Evaluates the turn-to-turn condition of the stator only by comparing the waveforms of two windings when a fast rise time pulse of twice the voltage plus 1000 volts. If there are correctable issues, such as contaminated windings, this test may damage the motor windings.
- Partial Discharge testing: This is a non-destructive test method that measures radio frequencies from discharges in voids within the insulation system of the motor windings. This is effective for trending on machines that are over 6.6 kV and only provides a brief warning from 4 kV. It does not detect any rotor faults.
- Motor Current Signature Analysis: Was designed for rotor testing of induction motors.
- Voltage Drop Test: Requires that the motor is disassembled. A 115 AC voltage is applied to the rotor windings and the voltage drop is measured with a voltmeter across each coil. If there is a short, the voltage drop will vary more than 3%.
The above list does not include equipment for the mechanical testing of synchronous motors.
About the ALL-TEST Pro Instrument
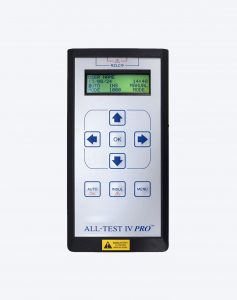
The ALL-TEST IV PRO™ (Editor- ALL-TEST PRO 5™ is the recommended replacement for the ATIV™) is a simple electronic instrument that performs in much the same manner as a multi-meter, except that it provides a series of readings that cover the AC parameters of the motor circuit. It is a data collector and tester that sends a low-voltage DC signal for simple resistance testing, in the same manner as a milli-Ohm meter, and a low-voltage, high-frequency AC signal for AC readings. The instrument then measures and calculates test results in engineering units of resistance, impedance, inductance, phase angle, current/frequency response, and an insulation resistance test to ground.
The primary differences between electronic testing of power equipment versus traditional power methods are:
- A more complete view of the motor circuit, including influences from changes in the condition of rotor field coil insulation.
- One instrument for a large range of equipment size. The test is limited only to the simple resistance range of the instrument (0.010 Ohm to 999 Ohms).
- Non-destructive – no harmful voltage is applied.
- Easier data interpretation – A few simple rules for data interpretation (See data interpretation below).
- Handheld vs. equipment that may weigh from 40 lbs to well over 100 lbs.
- Internal power source for the instrument.
As an insulation system ages, or if the insulation system is contaminated and it is affecting the integrity of the insulation, the electrical circuit of the motor changes. Because the rotor is an integral part of the circuit, changes to the electrical integrity of the rotor circuit and insulation system are directly reflected through the stator windings, as well. This allows both immediate troubleshooting and long-term trending of the motor.
Unique test information allows the ALL-TEST Pro Instruments to view enough parameters of the insulation system to detect and isolate:
- Shorted stator windings
- Shorted rotor fields
- Broken amortisseur winding bars
- Air gap eccentricity
- Winding contamination (rotor and stator)
- Ground insulation faults
Basic Steps for the Analysis of Synchronous Machines with ALL-TEST Pro Instruments
The steps for testing synchronous machines are similar to those for evaluating the condition of standard induction motors. However, because there are field coils on the motor rotor, a few additional steps are involved when troubleshooting a fault.
When testing a synchronous machine from the motor control center or starter:
- De-energize the equipment. Ensure that secondary sources of power are also de-energized.
- Perform the standard ALL-TEST IV PRO™ (now AT5™) tests on the stator following the menu prompts on the instrument.
- Evaluate the test results (See Expected Test Results)
- If a fault is indicated, begin troubleshooting:
- Adjust the position of the rotor, as much as possible, up to 45 degrees (any movement will do if the rotor is difficult to turn, but no less than 5 degrees)
- Re-perform the tests and review the readings. If the fault has shifted, or changed by more than a digit, then the fault most likely is located in the rotor.
- If the fault remains stationary (does not change with rotor position), then disconnect the leads at the motor terminal box and retest. If a fault is still indicated, it is most likely in the stator, if not, it is most likely in the cable.
The average test time, other than troubleshooting, is approximately 3-5 minutes.
When testing a disassembled synchronous machine, it is important to remember that the readings will be very different without the rotor in place:
- Perform the ALL-TEST IV PRO™ Auto test (AT5 Z/ test mode) on the stator and evaluate the test results. This will provide an immediate indication of any faults.
- For the rotor test:
- Perform the Auto test and compare to a past reading; or,
- Perform the Auto test and compare to an ‘identical’ rotor; or,
- Perform the Auto test across each field coil instead of a voltage drop test.
- All parameters for all three should meet the evaluation limits.
Because of the style of testing, these results can be trended and compared between like machines.
Other applications for motor circuit testing include evaluation and acceptance, and predictive maintenance.
Expected Test Results
As mentioned in the last section of this paper, the test results are similar to those found in three-phase induction machines. Fault patterns are very straightforward and apply regardless of equipment size, within the test range of the ALL-TEST Pro Instruments. Following is a brief overview of the test measurements and their results for basic troubleshooting:
- Simple resistance measurements: These are an indicator of high resistance connections, loose connections, or broken conductors in the circuit. This test is important, especially if the resistance problem is in one spot as, based upon I2R, a resistive spot will put out a great deal of heat energy (in Watts). For instance, a 0.5 Ohm resistance across a point in a circuit that is seeing 100 Amps would give off: (100Amps2)(0.5 Ohms) = 5,000 Watts (5kW) worth of energy. This is about the same energy used to turn 6 horsepower worth of electric motor.
- Inductance measurement: This is an indicator of the magnetic strength of a coil and the influence of other coils on one coil. It is impacted by the number of turns in a circuit, the dimensions of the coils, and the inductance of other coils. This measurement, by itself, is only a good indicator of the condition of the amortisseur winding and rotor eccentricity. Inductance will only show a shorted winding if it is severe.
- Impedance measurement: This is the measurement of the complex resistance in the circuit. It can be used, much like inductance, for checking the amortisseur winding and rotor condition. However, when used along with inductance, it can be used to detect overheated windings and winding contamination quickly. By viewing the relationship of inductance and impedance between each phase: If the inductance and impedance are relatively parallel, then any inductive and impedance unbalance is in the relationship between the rotor and stator (rotor position); If they are not parallel, this is an indication of an insulation problem such as insulation breakdown or winding contamination.
- Phase angle and I/F (Current/Frequency): These are both indicators of insulation faults between turns in the stator or rotor.
- Insulation Resistance: Evaluates the insulation to ground and will only indicate when the insulation has failed.
The test limit recommendations, as outlined in the “Guideline for Electronic Static Winding Circuit Analysis of Rotating Machinery and Transformers,” are as follows:
Table 1: Test Limits (peak-to-peak values)
| Measurement | Limits |
| Resistance | 5% |
| Impedance | ~ 5%* |
| Inductance | ~5%* |
| Phase Angle | +/- 1 |
| I/F | +/- 2 |
| Insulation Resistance | > 100 M-Ohms |
*Can exceed this value if measurements are parallel.
Following is an overview of the troubleshooting rules:
- Shorted Windings:
- Shorted windings can be evaluated by viewing the phase angle and I/F readings from the instrument on similar coils or between phases:
- Phase Angle (Fi) – The phase angle should be within 1 digit of the average reading. For instance, a reading of 77/75/76 would be good because the average reading is 76. A reading of 74/77/77 would be bad.
- Current Frequency Response (I/F) – The current frequency response should be within 2 digits of the average reading. For instance, a reading of –44/-45/-46 would be good. A reading of -40/-44/-44 would be bad. However, a reading such as -42/-44/-44 should be considered suspect.
- Winding Contamination and Rotor Position
- The position of the rotor within the electric motor may cause a natural phase unbalance. Winding contamination will also cause phase unbalances. Evaluation of the DF can show if the phase unbalance comes from the rotor or contamination.
- Rotor Position – Rotor position unbalances can be evaluated by looking to see if the inductance and impedance values are fairly balanced. For instance, if there are inductances of 17/18/19 and impedances of values 24/26/29, then the unbalance is due to rotor position. This may also be the case if the inductances are 5/5/5 and the impedances are 8/9/8.
- Winding Contamination – This can also be found in overheated (burned) windings. These conditions are the result of changes to the insulation due to the breakdown of the insulation system.
Conclusion
Through a set of simple rules and instructions, the ALL-TEST IV PRO™ (now AT5™) provides an excellent tool for troubleshooting and trending the condition of synchronous machines. The test is performed using simple, non-destructive test measurements that allow for a more complete view of the motor stator and rotor circuit than any other test. Test evaluation is simple and direct, regardless of equipment size or type.
Bibliography
- Guideline for Electronic Static Winding Circuit Analysis of Rotating Machinery and Transformers, BJM Corp, ALL-TEST Division, 2001.
- Penrose, Howard W. Motor Circuit Analysis: Theory, Application and Energy Analysis, SUCCESS by DESIGN, 2001.
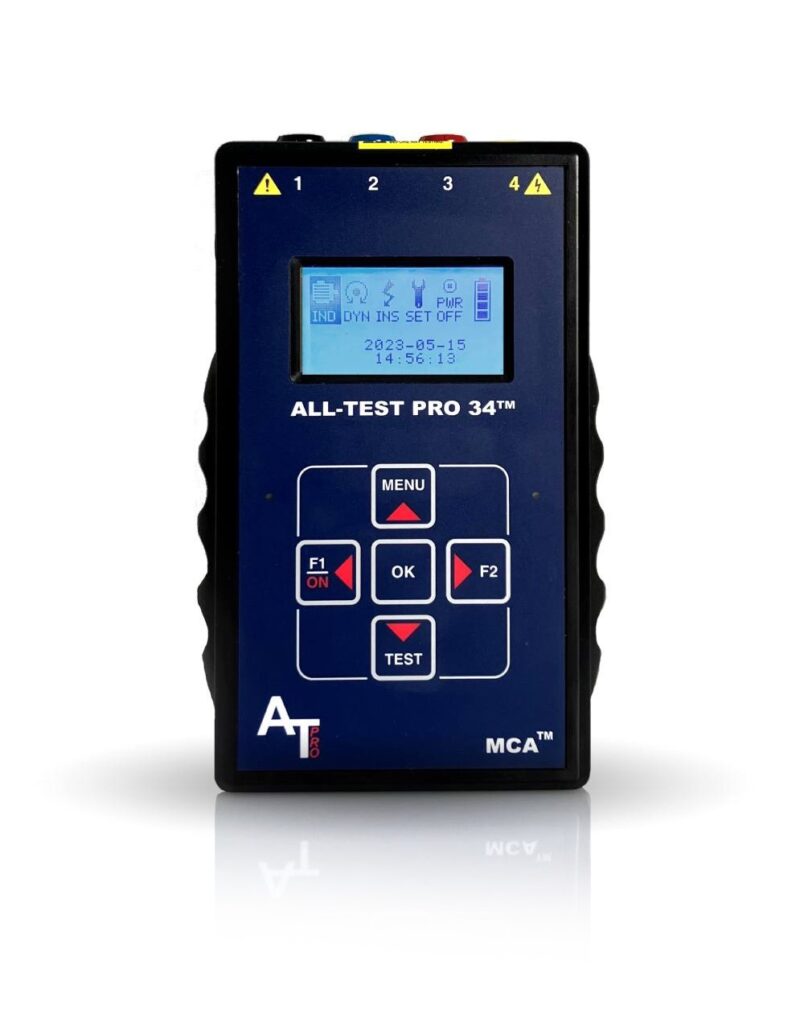
AT34™
Analyze and trend motor component integrity for ground faults, internal winding faults, open connections, and contamination – all with one hand-held device.

Motor Diagnostic Seminar at the University of Tennessee Reliability Center – Level 1 & Level 2 – July 22
The University of Tennessee Reliability Center and ALL-TEST Pro have teamed up to publicly present Motor Diagnostic Seminar Level I and Level II training courses this summer! This is a […]

Online World Class Motor Diagnostic Seminar – Level 1 – April 15-19
Have you heard? We will be holding our World Class Motor Diagnostic Seminar Level 1 on April 15-19. This will be an online/virtual seminar starting each day at 8AM EST. […]